
Drawing guide
How to transfer a drawing to a wall: a measured mural grid guide
Updated
A large wall can make a correct sketch look wrong when its crop, obstacles, or scale drift. Measure the rectangle first, then transfer the mural in small, checkable relationships.
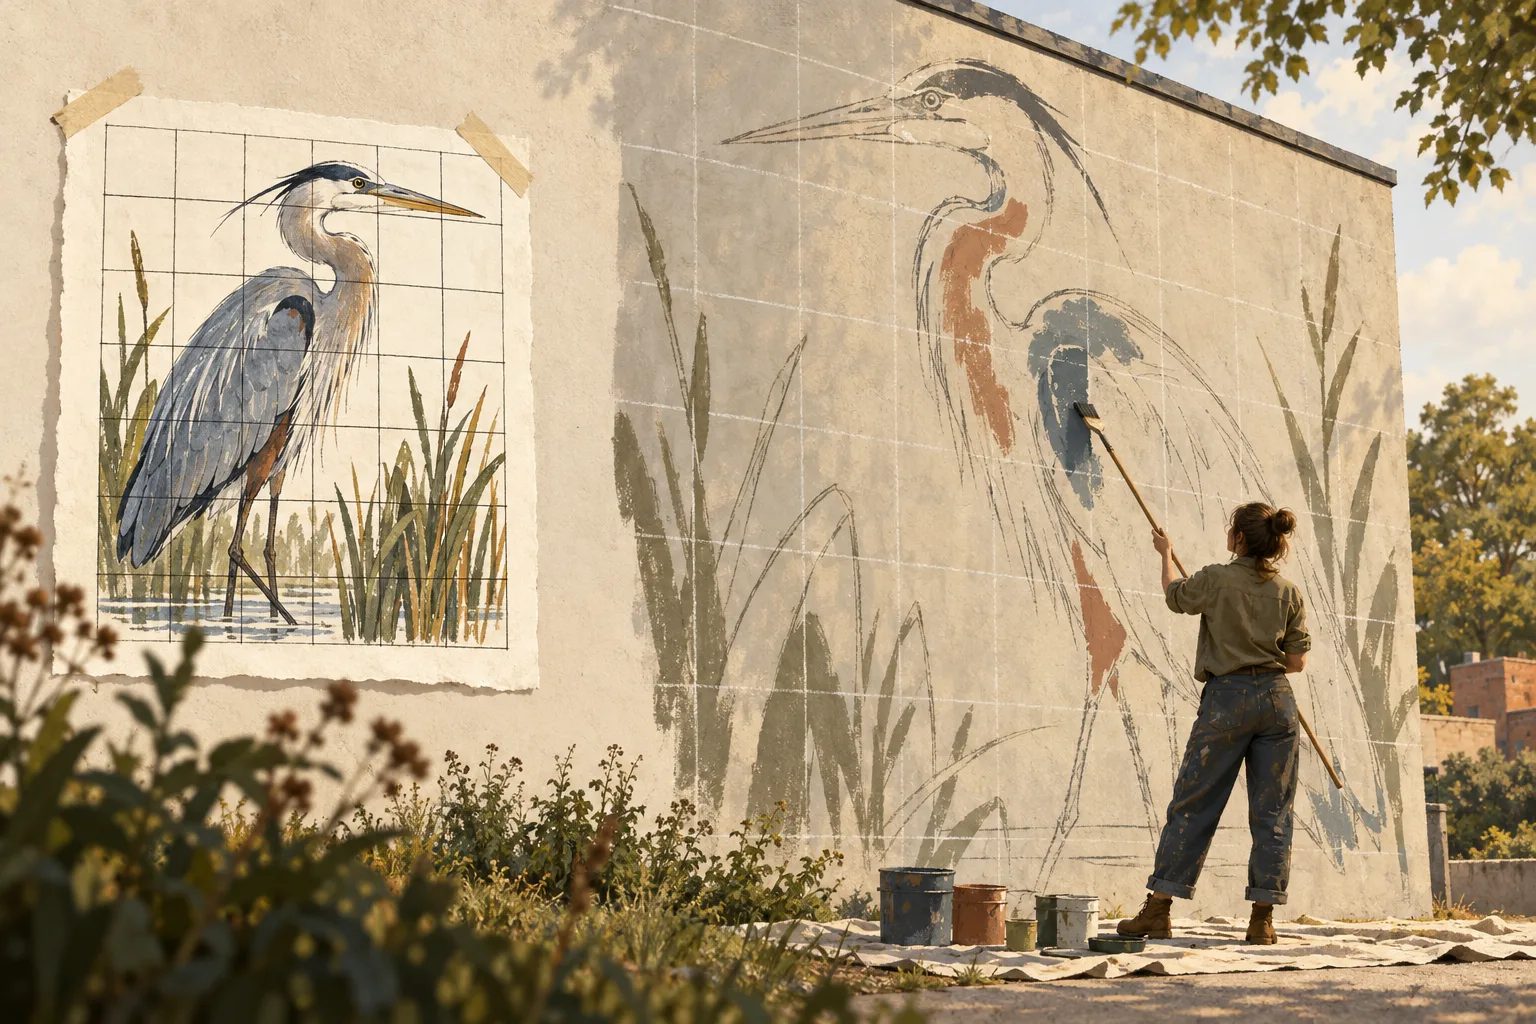
A wall magnifies small proportion errors. A drawing that looks balanced on a sheet can become too wide, too high, or visibly shifted when the first and last marks are metres apart. The reliable answer is a measured drawing rectangle: settle the crop, record the wall, and use a grid to carry positions from the reference into that rectangle. ArtGrid can create the reference overlay locally in your browser; the physical wall still needs its own measurements, access plan, and surface preparation.
Before you begin, read a site-specific installation checklist such as the Frankfort mural guidance at https://www.frankfort.ky.gov/DocumentCenter/View/1826/Mural-Installation-Guide. Treat that document as an authority for site planning and installation questions, not as a substitute for checking your wall, permissions, materials, or working height.
1. Measure the wall and its interruptions
Measure the usable rectangle, not the nominal room dimension. Record width and height at the top, middle, and bottom; older walls, corners, skirting, and floors can vary. Photograph the surface with a tape measure visible, then mark the edges of the area the mural will actually occupy. Note doors, windows, sockets, pipes, signs, vents, radiators, ledges, repairs, and any region that cannot receive paint. Each opening needs its own left, top, width, and height measurement from the same reference corner.
Choose a baseline that can be found again: usually a level line near the floor or a clearly measured top edge. Establish a second vertical datum from a corner or surveyed mark. Check both with a level or laser, but record the actual measured points rather than assuming the building is square. A window is an interruption in the drawing rectangle; it is not permission to stretch the artwork around it. Decide whether the image continues behind an obstruction, ends at it, or is composed around it before making the grid.
2. Worked example: a 10 × 5 m wall
Suppose the approved mural area is 10 m wide by 5 m high. A hand-ruled grid with 20 columns and 10 rows gives 50 cm cells in both directions: 10 m ÷ 20 = 0.5 m and 5 m ÷ 10 = 0.5 m. A 20 × 10 cm paper design with 1 cm squares therefore maps to the same cell addresses on the wall. Mark 0, 500, 1,000, and so on along the baseline, and repeat the process vertically from the independently checked datum.
To reproduce this layout in ArtGrid, first crop the source image to the wall's 2:1 proportion. Enable Target surface, select cm, and enter width 1000 and height 500. Choose Cell size and enter 500: that control uses millimetres even when target dimensions use centimetres. Check that the readout shows 20 columns and 10 rows with 500 mm drawing squares. On A4 the printed reference grid is 186 × 93 mm with 9.3 mm cells; the wall grid is 10,000 × 5,000 mm. Use the reference PNG on a tablet or print the single-sheet PDF. You do not need to tile-print the entire ten-metre wall.
If the approved mural uses a border, measure that border as part of the composition. For example, a 20 cm inset on every side leaves a 9.6 × 4.6 m drawing rectangle, which is no longer the 10 × 5 m cell calculation. Label the working rectangle, the wall edges, and the excluded bands separately so a helper cannot mistake a guide mark for an artwork boundary.
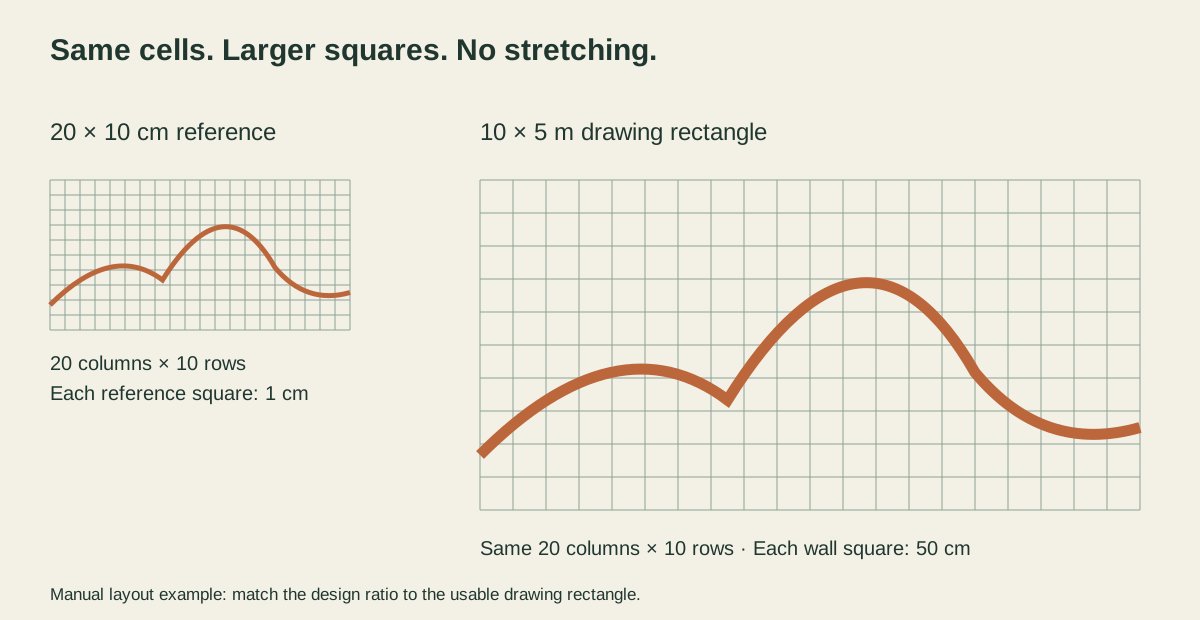
3. Transfer landmarks as fractions, not guesses
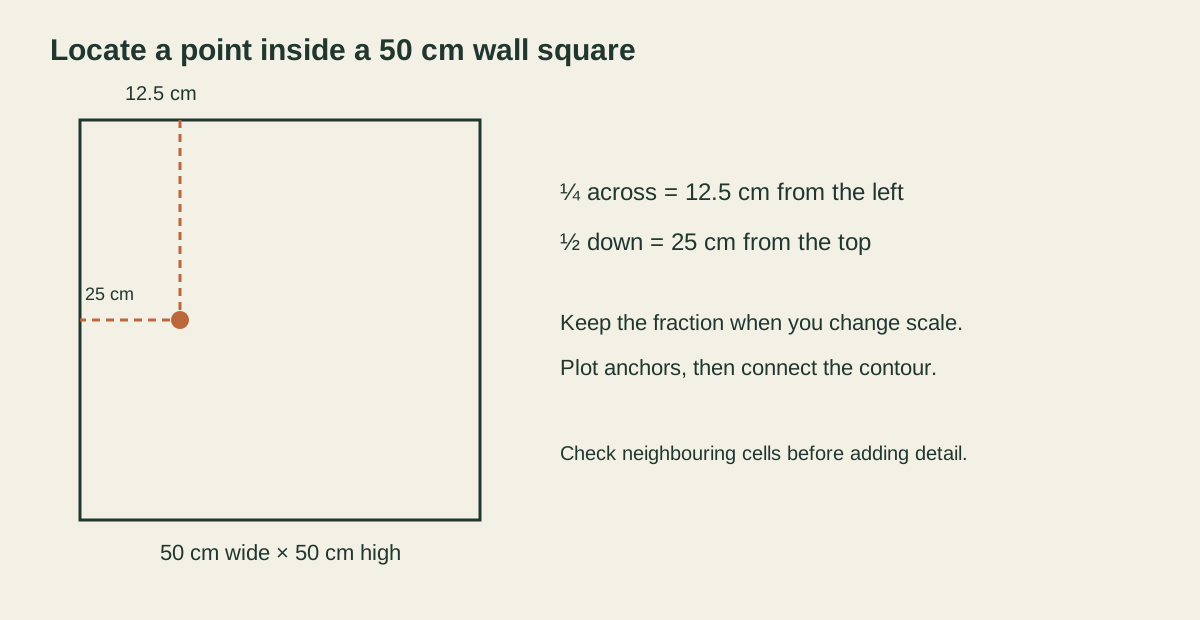
A cell tells you where to look; it does not replace observation. In each 50 cm cell, locate contour crossings and landmarks as fractions of the cell. One quarter of a cell is 50 cm × 1/4 = 12.5 cm. A point three quarters across is 37.5 cm from the left grid line. A point halfway down the same square is 25 cm below its top edge. Use the same fraction on the gridded reference and the wall, even when their absolute cell sizes differ.
Start with the outer silhouette, centre axes, horizon, large shadow boundaries, and the corners of important shapes. Plot where each line enters and leaves a cell before joining those points across the boundary. This keeps a long curve continuous. Recheck the negative spaces around the subject; a gap beside an arm or between a roof and the frame can reveal a misplaced landmark sooner than a detailed face can.
4. Keep the baseline independently measured
Measure the baseline intervals independently instead of placing the next mark by adding another 50 cm to the previous mark. Repeated small ruler errors accumulate: nineteen intervals that are each 3 mm short leave the far edge 57 mm out of position. Mark the full span, verify the end mark against the corner or survey datum, and then check several intermediate intervals. A laser can help you see a line, but the written measurements and fixed reference points remain the record.
Use the same discipline for rows. Check the first, middle, and last horizontal lines, then compare the diagonal between opposite corners if the surface permits. If the wall slopes or the usable area is not rectangular, stop and redraw the measured working rectangle; do not force a square grid to hide a building error.
5. Block the silhouette before detail
Transfer the largest silhouette and shadow masses before windows, lettering, facial features, or texture. Step back at the distance from which the mural will normally be seen and compare the image with the clean reference. A strong silhouette test exposes a wrong crop while marks are still easy to move. After the big shapes agree, add the secondary contours and reserve fine detail for the final pass.
Choose your transfer method around the site. The grid offers repeatable measurements, a projector offers a luminous temporary outline, and a doodle grid uses irregular marks as visual anchors rather than measured rows. ArtGrid creates regular square grids; it does not align a design to a photographed doodle grid. Pick the method your surface, access, lighting, and crew can verify, then keep a clean reference beside the wall.
6. On-site checklist before paint
Before painting, confirm the approved crop and wall rectangle, remeasure the baseline and top edge, mark every window and fixed obstacle, label the grid origin, and photograph the completed construction lines. Check that the surface is clean and compatible with the planned primer and paint. Arrange suitable site access before starting the transfer. Keep the drawing file, dimensions, colour notes, and obstacle measurements together so a replacement helper can read the plan.
Do a small paint test on the actual surface or a matching sample. Look for adhesion, sheen, colour shift, and how easily construction marks disappear. Only then commit to the large fills. The goal of the grid is a dependable placement check; it cannot decide permissions, structural access, paint compatibility, or whether an opening should become part of the composition.
Mural grid FAQ
Can I use the 20-column, 10-row example directly in ArtGrid? Yes: enter a 1000 × 500 cm target and use Cell size 500 mm. Check for 20 columns, 10 rows, and 500 mm drawing cells. Columns mode derives rows from the reference paper, so it is a different setup.
What if a window interrupts one cell? Measure the opening from the fixed origin and record its edges in the corresponding reference cells. Decide whether the image passes behind, stops at, or composes around the window; never move the grid locally to make the obstacle fit.
Should I start with details that are easy to recognise? Start with the silhouette, axes, and large shadow shapes. Detail can make one area look finished while the overall mural is still shifted, so check the full wall at viewing distance first.